How To Re-Publish Your Existing Blog Posts On Medium To Drive Extra Traffic

Medium.com is a great platform to publish & read a story.
For a blogger like you & me, it’s also a great platform to republish existing content & drive more traffic.
Content syndication is not a new term for bloggers; it is a widely used strategy to drive more traffic to existing content.
One of our writers, Chintan, has previously shared an extensive guide on 30+ tested platforms to distribute content & get insane traffic.
Today, I’m extending this series to let you know how you can import your content on Medium & drive more traffic.
Now, before we get going, the most obvious question in a scenario like this is:
Well, that’s taken care of at Medium, as they use the rel=canonical tag which passes the ultimate authority of the content to the website from where you are importing that content.
I have explicitly spoken about the importance of the canonical tag earlier:
But why Medium.com?
Well, Medium.com is a very popular platform when it comes to reading content. Their UI is user-friendly & they are one of the most visited websites in the world.
Here are the latest stats from Similarweb:

With a global rank of 416 & it being an even more popular site in the USA, it’s a great platform for a blogger in any niche to republish their content & reach a new audience for free.
Creating an account on Medium.com is fast as you can use Twitter, Facebook, Google, or even your email to sign up. Once you are logged in, you can start reading stories and following people & publications.
In this tutorial, you will learn everything you need to know before importing & publishing your existing blog posts on Medium.
If you have any questions before importing your first blog post, feel free to ask me in the comments section below.
The Beginner’s Guide to Content Syndication on Medium.com
Medium offers an import tool that you can use to import existing blog posts from other platforms to Medium.com. However, this tool doesn’t import images or videos (sometimes), and for that you need to add them in manually before publishing.
So without further delay, let’s learn something new…!
To get started:
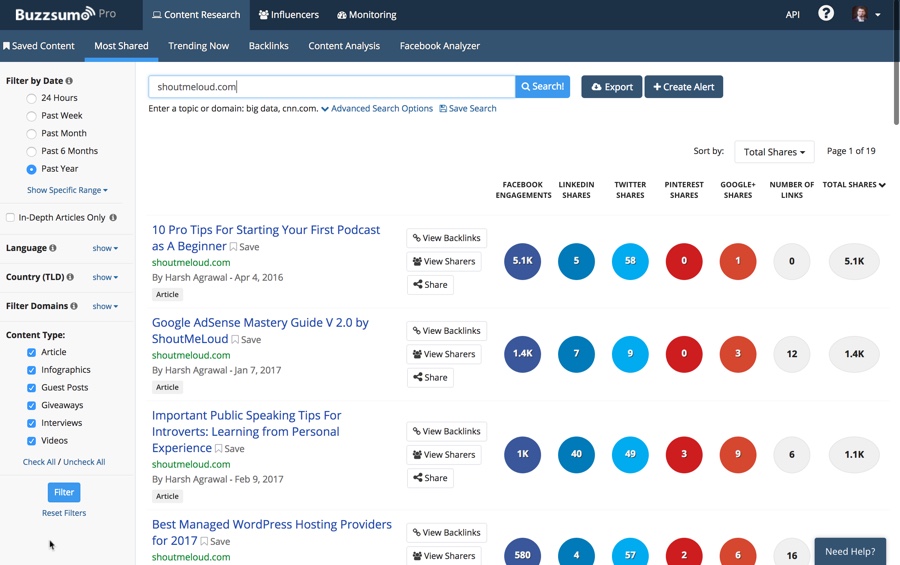
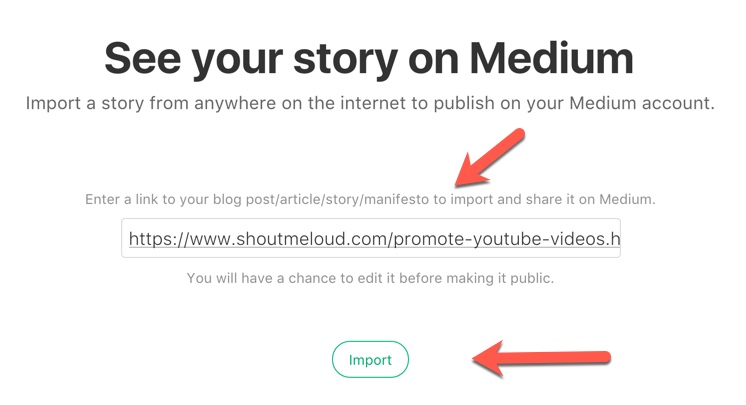
This will fetch all the texts & formatting from your existing posts to Medium.
At the bottom of the imported post, it will also add a link to the original post with the rel=canonical tag.
At this moment, the post is in draft mode & we need to do a few important things before publishing it.
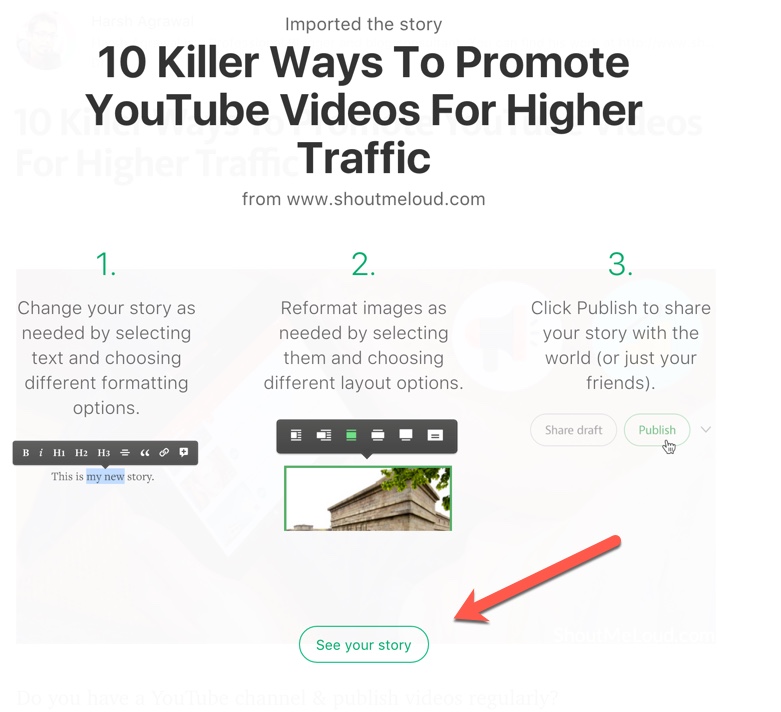
If you have text only content, then the task is easier for you.
However, I highly recommend you add in a few images as it makes your article more readable & enjoyable to read. If you don’t have any, you can use any of these sites to get free images for your blog posts.
If you already have images on your original content, you need to download & upload them to the imported post. Click on “See your story” & from there you can start editing content and/or adding multimedia.
Note: In some scenarios, Medium.com also imports images automatically & uploads them to their server.
The first thing you should do here is customize the post title & permalink to make them search engine friendly.
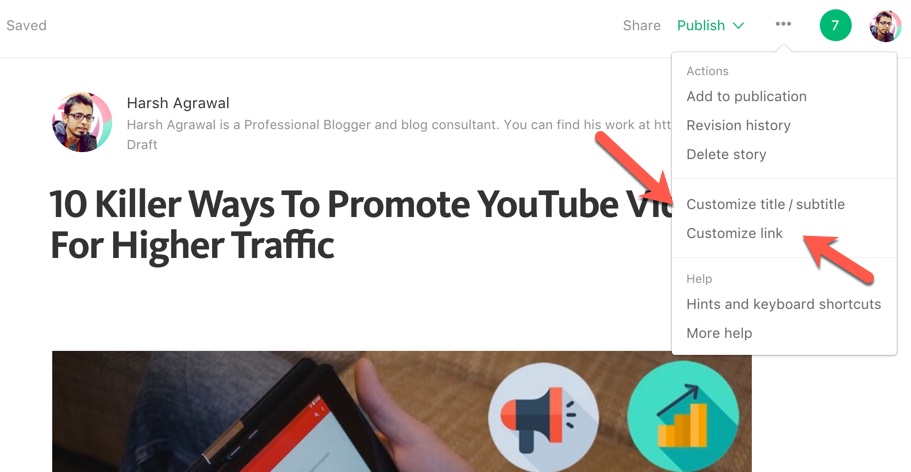
In this case, I’m customizing the link, so I click on Customize link.
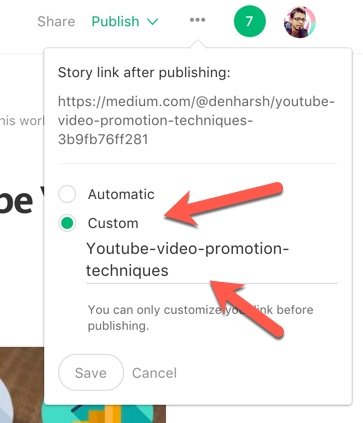
Now, before you publish it, there is one very important thing to do- add tags.
Using the right tags makes your story discoverable. You can use up to 5 tags on Medium.
Click on the dropdown link next to “Publish” & add some tags.
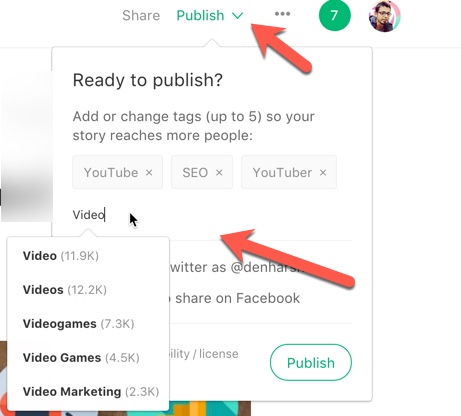
When you add a word, it automatically shows the number of times the tags have been used.
Make sure you use only relevant tags. You can also create a tag of your own instead of using a suggested tag.
Your Medium.com story is now live.
You can see one such piece of republished content on my Medium blog here.
Medium Publications: Curate Content & Branding Opportunity
Medium also offers publications which you can create for a brand or a topic. For example, here is a Medium publication I created for ShoutMeLoud.
Publications are great because:
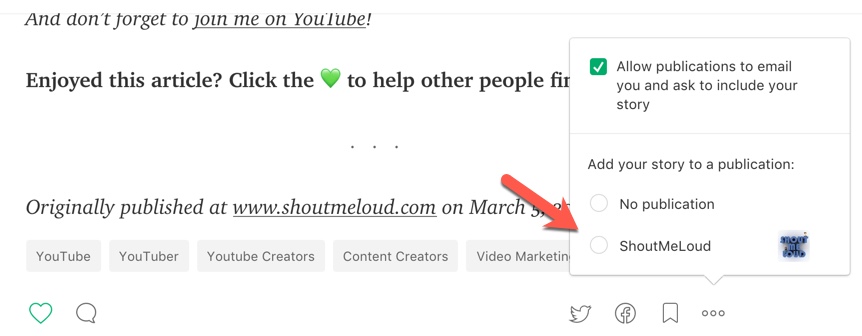
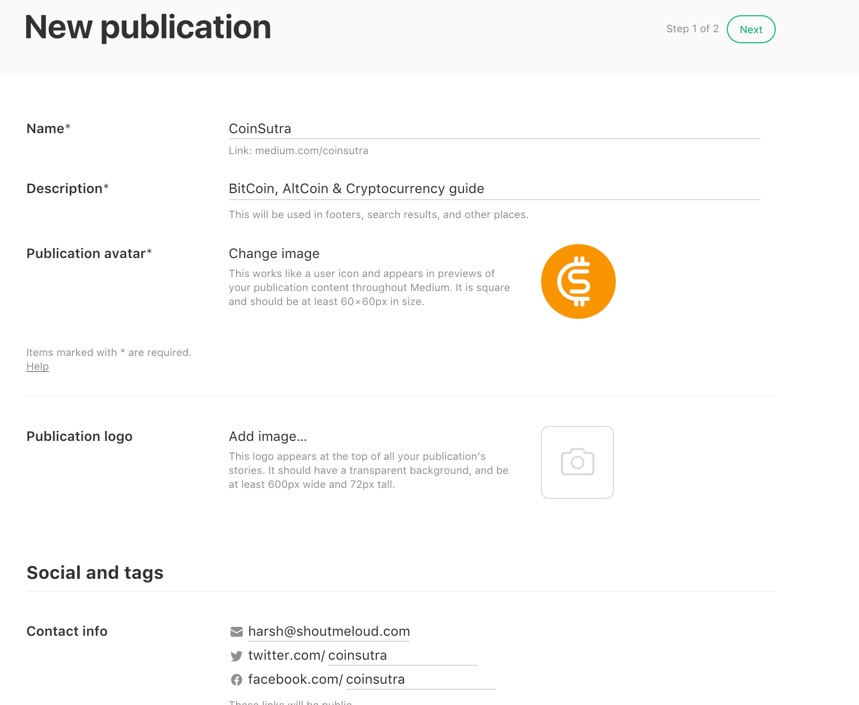
Note: You can also import a piece of content & schedule it to be published a later date. However, when you import content on Medium, it publishes using the same date when the article was originally published.
Personally, I enjoy reading articles on Medium as it offers great discovery in the form of tags & the interface is very reader-friendly. They also have an iOS & an Android app that you can use for reading or managing your profile & publications on mobile.
What I usually do: I import a story to my profile & then publish it to my publication. This way, when people read stories, they follow both- the publication & my personal profile.
Stats on Medium
What would be the point of publishing when you can’t see the stats?
Well, with Medium, you can see stats for both your profile and your publications.
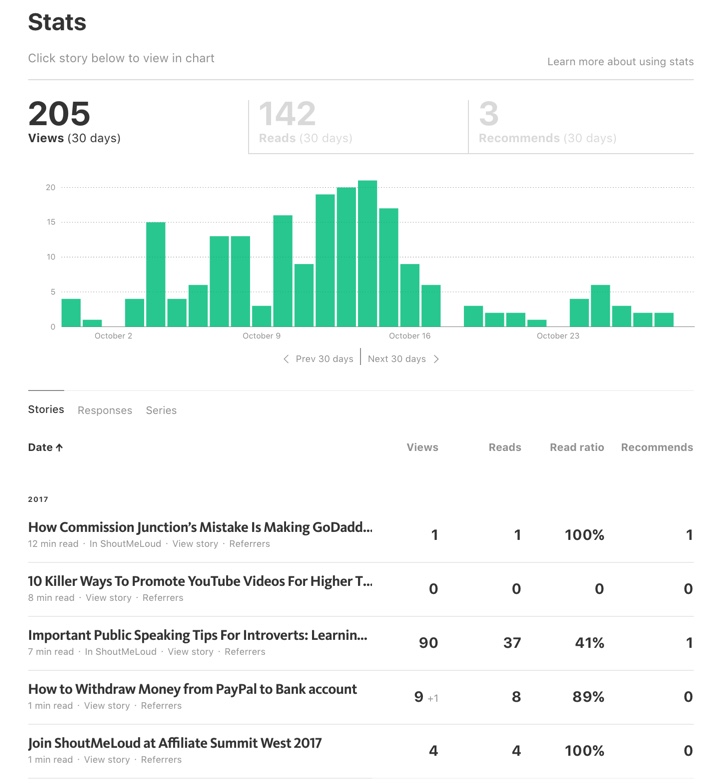
Click on Referrers under any story and you will be able to see more stats about that individual story.
Here are the stats from one of my published stories on Medium:
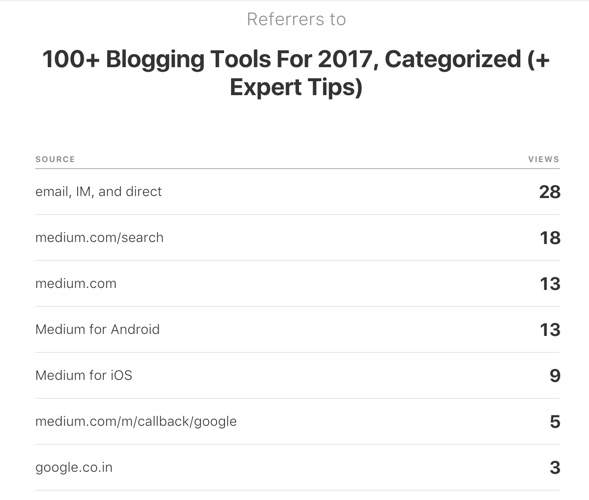
What’s really important here to get more traffic to your Medium.com posts is:
Even though it’s not a platform that you own, you need to consider the possibility of the reach of your existing content. Unlike other content syndication methods, this can be completely managed by you or someone from your team.
Overall, it will definitely help your work reach more eyes & get more praise.
That’s all from me on this beginner’s guide to content syndication on Medium. Now, it’s your turn to let me know how you are syndicating your content. Have you started using Medium? What’s your Medium experience? Share your experience & expert comments in the comments section below.
If you found this guide useful for driving extra traffic, do share it with other bloggers to also help them get more free traffic


 to help other people find it.”
Leave a Comment